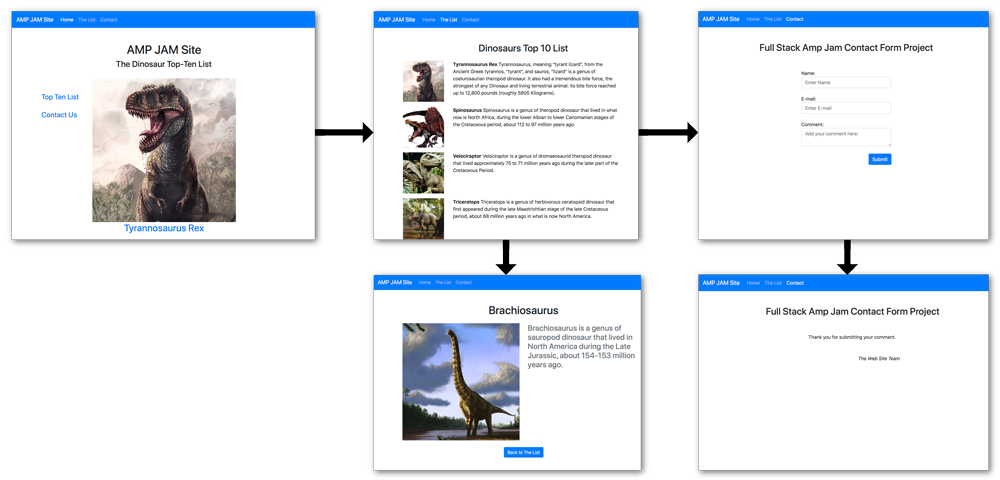
The SITE. The SITE project is an intermediate full-stack project that builds on the previous projects, The TABLE, The LIST, and The FORM. We will build some new pages and collect versions of those pages into a site. We will tie all the pages together with a "Nav-Bar", which is a top-of-page navigation feature (like the one you see at the top of this page). We will use Bootstrap and jQuery for this, and update the projects we are bringing in from the previous exercises with Bootstrap and jQuery.
You can download scripts for completed versions of the previous projects here if you need them.
You can open a completed version of the project in your browser here.
If you want to download completed versions of the PHP scripts and image files for this project, you can find them here.
This project has several steps:
- Create a Home Page for the site.
- Create a Bootstrap "nav-bar" that provides site navigation.
- Collect the "<head>" section and the nav-bar into a separate PHP file, so it can be "included" in all the site pages.
- Update the "list" file with Bootstrap formatting and jQuery scripting.
- Create a new "Detail Page" that will allow the user to click on a list item and see a page that features the list item.
- Update the form with Bootstrap styling and layout.
Once The SITE Project is built, it will be used as the basis for the upcoming exercises.
Project Set-up. As before, set up a directory in the htdocs folder to hold your project. I recommend naming it n413_site. We will use Bootstrap and jQuery in this project, so add a css folder and a js folder to hold these resources. You can download Bootstrap (version 4.4.1) and jQuery (version 3.4.1) from the Resources page, or if you want to update the version, you can find links to the Bootstrap and jQuery sites on the Resources page, also.
Note: The current version of jQuery (version 3.5.0) caused problems with the mobile menu on the nav-bar, so avoid that version.
Copy these files to your css folder:
- bootstrap.min.css
- bootstrap.min.css.map
Copy these files to your js folder:
- bootstrap.min.js
- bootstrap.min.js.map
- jquery-3.4.1.min.js
Note: If you have a version update or other variation that changes the file name, that's OK as long as you make sure the link for loading the file works.
There are alternative methods of linking to the Bootstrap and jQuery files, such as CDN links or package managers (Composer, etc.) that you can use if you prefer.
Copy a version of your connection script file from one of the other projects, and place it in your project folder (not in the css or js folders). Copy list_4.php from the List project, and rename it list.php. Copy form_1.html from the Form project and rename it form.php. Also, copy n413post.php from the Form project. Last, copy the images folder from the List project. All of these should go directly into your project folder.
Next, create a file for the landing page in your project folder, and name it index.php. Open a PHP tag ("<?php") and inside it, write an "include" for your connection script, then insert a few lines and close the PHP tag:
<?php
include("n413connect.php");

?>
Head Section. Instead of making a separate "<head>" section for each page of the site, we will make a template version and use an "include" to pull it into our page. Create a new file in your project folder and name it "head.php". Write the "<head>" section with ordinary HTML markup and insert links for the Bootstrap and jQuery files. For efficiency, add the top part of the page into the head.php file. This will be the opening "<body>" tag, and in the next section we will add the "nav-bar":
 <!DOCTYPE html>
    <html>
        <head>
            <meta http-equiv="Content-Type" content="text/html; charset=UTF-8" />
            <meta name="viewport" content="width=device-width, initial-scale=1, user-scalable=yes">
            <title>Full Stack Amp Jam Site Project</title>
            <link href="css/bootstrap.min.css" rel="stylesheet">

            <script src="js/jquery-3.4.1.min.js" type="application/javascript"></script>
            <script src="js/bootstrap.min.js" type="application/javascript"></script>
            <script src="js/bootstrap.min.js.map" type="application/javascript"></script>
        </head>
        <body>
The sequence of the Javascript files is important. Be sure jQuery is first, followed by the Bootstrap files.
Nav-Bar. The Nav-bar will be built with Bootstrap. If you are new to Bootstrap, check the Bootstrap Resource page. You should also have a look at the official Bootstrap web site, and get acquainted with the resources there.
Click here to see a basic version of the nav-bar on the Bootstrap site. There is a "Copy" button at the upper right of the example code, and we will use it to drop the Bootstrap code into our "head.php" file:
 <!DOCTYPE html>
    <html>
        <head>
            <meta http-equiv="Content-Type" content="text/html; charset=UTF-8" />
            <meta name="viewport" content="width=device-width, initial-scale=1, user-scalable=yes">
            <title>Full Stack Amp Jam Site Project</title>
            <link href="css/bootstrap.min.css" rel="stylesheet">

            <script src="js/jquery-3.4.1.min.js" type="application/javascript"></script>
            <script src="js/bootstrap.min.js" type="application/javascript"></script>
            <script src="js/bootstrap.min.js.map" type="application/javascript"></script>
        </head>
        <body>
            <nav class="navbar navbar-expand-lg navbar-light bg-light">
               <a class="navbar-brand" href="#">Navbar</a>
               <button class="navbar-toggler" type="button" data-toggle="collapse" data-target="#navbarNav" aria-controls="navbarNav" aria-expanded="false" aria-label="Toggle navigation"><span class="navbar-toggler-icon"></span>
               </button>
               <div class="collapse navbar-collapse" id="navbarNav">
                  <ul class="navbar-nav">
                     <li class="nav-item active">
                        <a class="nav-link" href="#">Home <span class="sr-only">(current)</span></a>
                     </li>
                     <li class="nav-item">
                        <a class="nav-link" href="#">Features</a>
                     </li>
                     <li class="nav-item">
                        <a class="nav-link" href="#">Pricing</a>
                     </li>
                     <li class="nav-item">
                        <a class="nav-link disabled" href="#" tabindex="-1" aria-disabled="true">Disabled</a>
                     </li>
                  </ul>
               </div>
            </nav>

Save your "head.php" file and test it in your browser. You should see the nav-bar at the top of the window, styled as it is on the Bootstrap site. If things don't look right (no CSS, etc.), check all your links in the <head> section and be sure the CSS and JS files are loading.
The nav-bar is daunting to look at at first, but let's deconstruct it to see where we can customize the example for our purpose.- <nav> The enclosing <nav> tag sets the navbar class, which defines the size of the navbar and the color scheme. You can learn more about customizing the color scheme here.
- navbar-brand The navbar-brand element is an <a> tag with the navbar-brand class applied. It is optional, and the <a> tag can link to where ever you wish. It usually links to the Home page. The link text may be edited and/or an image can be included, as you see in the nav-bar at the top of this page. Images can cause styling issues, so be cautious.
- navbar-toggler <button> This is the button that appears when the window is collapsed to show the "mobile" menu. You can see it in the nav-bar for this page if you resize the window to be narrow. You should leave this as-is.
- <div> container. This applies the classes for collapsing the nav-bar and displaying the mobile menu. Leave this tag and its classes as-is. Inside the <div> tag will be the content of the nav-bar. This example shows a <ul> list, but you can include other elements, such as a second list of right-aligned links, a search form, drop-down menus, and more.
- <ul> and <li> tags. This is one way (of several) to format the nav-bar links. You can also use <a> tags or forms. Notice that the <li> tags are given nav-item classes. The item for the current page is also given an active class (which changes its appearance). The active item also has special screen-reader content for accessibility. The <li> items enclose <a> tags, which provide the navigation links. Note that the nav-link class is placed on the <a> tag.
Let's customize! Start with the <nav> tag. Those last two classes in the <nav> tag define the color scheme (dark or light) and the color utility. Color utilities tie in to the colors Bootstrap uses for lots things like buttons, alerts, etc. You can see them here. Alternatively, you can leave off the color utility class (the last one) and add an inline style that defines background-color. We will go with a dark color scheme and primary blue. (The inline style method is shown in a comment):
...
<nav class="navbar navbar-expand-lg navbar-dark bg-primary">
<!-- <nav class="navbar navbar-expand-lg navbar-dark"> style="background-color:#CCEEFF;"> -->
...

Make the change in your code and test.
Note: if you don't remove the color utility class, the inline style may not have any effect.
Now for the navbar-brand element: The URL should point to the index.php file, and the link text should be the name of the site:
...
<a class="navbar-brand" href="index.php">AMP JAM Site</a>
...

Finally, we will adapt the links: "Home", "The List", and "Contact". The "disabled" link is not needed, so it will be deleted. Since the idea is to use the same nav-bar code for all the pages, we will not put the active class on any of the links. Instead, we will give them ID's and use jQuery to add the active class when we each load the page. Let's go ahead and add URLs for index.php, list.php, and form.php in the <a> tag links:
...
<div class="collapse navbar-collapse" id="navbarNav">
    <ul class="navbar-nav">
        <li id="home_item" class="nav-item">
            <a id="home_link" class="nav-link" href="index.php">Home</a>
        </li>
        <li id="list_item" class="nav-item">
            <a id="list_link" class="nav-link" href="list.php">The List</a>
        </li>
        <li id="contact_item" class="nav-item">
            <a id="contact_link" class="nav-link" href="form.php">Contact</a>
        </li>
    </ul>
</div>
...

Here is the completed code for the head.php file:
 <!DOCTYPE html>
    <html>
        <head>
            <meta http-equiv="Content-Type" content="text/html; charset=UTF-8" />
            <meta name="viewport" content="width=device-width, initial-scale=1, user-scalable=yes">
            <title>Full Stack Amp Jam Site Project</title>
            <link href="css/bootstrap.min.css" rel="stylesheet">

            <script src="js/jquery-3.4.1.min.js" type="application/javascript"></script>
            <script src="js/bootstrap.min.js" type="application/javascript"></script>
            <script src="js/bootstrap.min.js.map" type="application/javascript"></script>
        </head>
        <body>
            <nav class="navbar navbar-expand-lg navbar-dark bg-primary">
               <a class="navbar-brand" href="index.php">AMP JAM Site</a>
               <button class="navbar-toggler" type="button" data-toggle="collapse" data-target="#navbarNav" aria-controls="navbarNav" aria-expanded="false" aria-label="Toggle navigation"><span class="navbar-toggler-icon"></span>
               </button>
               <div class="collapse navbar-collapse" id="navbarNav">
                  <ul class="navbar-nav">
                     <li id="home_item" class="nav-item">
                        <a id="home_link" class="nav-link" href="index.php">Home</a>
                     </li>
                    <li id="list_item" class="nav-item">
                        <a id="list_link" class="nav-link" href="list.php">The List</a>
                     </li>
                     <li id="contact_item" class="nav-item">
                        <a id="contact_link" class="nav-link" href="form.php">Contact</a>
                     </li>
                  </ul>
               </div>
            </nav>
Test head.php in your browser, then go back to index.php.
Add an "include" to pull head.php into index.php, then add a headline below the PHP tag:
(index.php)
<?php
    include("n413connect.php");
    include("head.php");
?>
<h1>AMP JAM Site</h1>
Test index.php in your browser. It should look like head.php, but with the headline added.
To get a quick-and-dirty version of the site working, drop the same code into the list.php and form.php files. For list.php, add the "include" for head.php after the "include" for the connection script:
(list.php)
<?php
    include("n413connect.php");
    include("head.php");
    $sql = "SELECT id, item, description, image FROM `list`";
    ...
In form.php, add PHP tags and the "include" for head.php at the beginning of the script. There is no reason to access the database directly from form.php, so we don't need to include the connection script here:
(form.php)
<?php
    include("head.php");
?>
<!DOCTYPE html>
    <html>
        <head>
        ...
Test this in your browser, and you should have a skeleton version of the site up and running!

There is some clean-up to do, so let's take care of that before we build out the pages:
Both list.php and form.php had completed <head> sections, which are no longer needed. However, there are styles in the <head> sections that should be kept. With both files, the <style> tag (and its contents) should be moved below the <body> tag for now. Later, these styles will be removed and replaced with Bootstrap classes. Remove everything from the !DOCTYPE declaration on through the opening <body> tag:
(list.php)
<?php
    include("n413connect.php");
    include("head.php");
    $sql = "SELECT id, item, description, image FROM `list`";
    $result = mysqli_query($link, $sql);
        $records = array();
        while ($row = mysqli_fetch_array($result, MYSQLI_BOTH)){
            $records[] = $row;
        }
?>
    <style>
        body  { font-family:Arial; }
        img   { display:inline-block;vertical-align:top;height:75px;margin-left:50px;margin-right:20px;margin-bottom:10px; }
        .desc { display:inline-block;width:60%;font-family:Arial;margin-bottom:10px;cursor:pointer;}
    </style>
    <h2>Full Stack Amp Jam List Project</h2>
    ...
(form.php)
<?php
    include("head.php");
?>
    <style>
        body	{ font-family:Arial; }
        h2	{ text-align:center;margin-top:50px; }
        #form-container { width:30%;margin-left:40%;margin-top:100px; }
        input { font-size:18px;margin-bottom:20px; }
        textarea {height:100px;width:300px;margin-bottom:30px;font-size:16px; }
        #submit	{float:right;}
    </style>
    <h2>Full Stack Amp Jam Form Project</h2>
    ...
Test it in your browser to be sure it all still works.
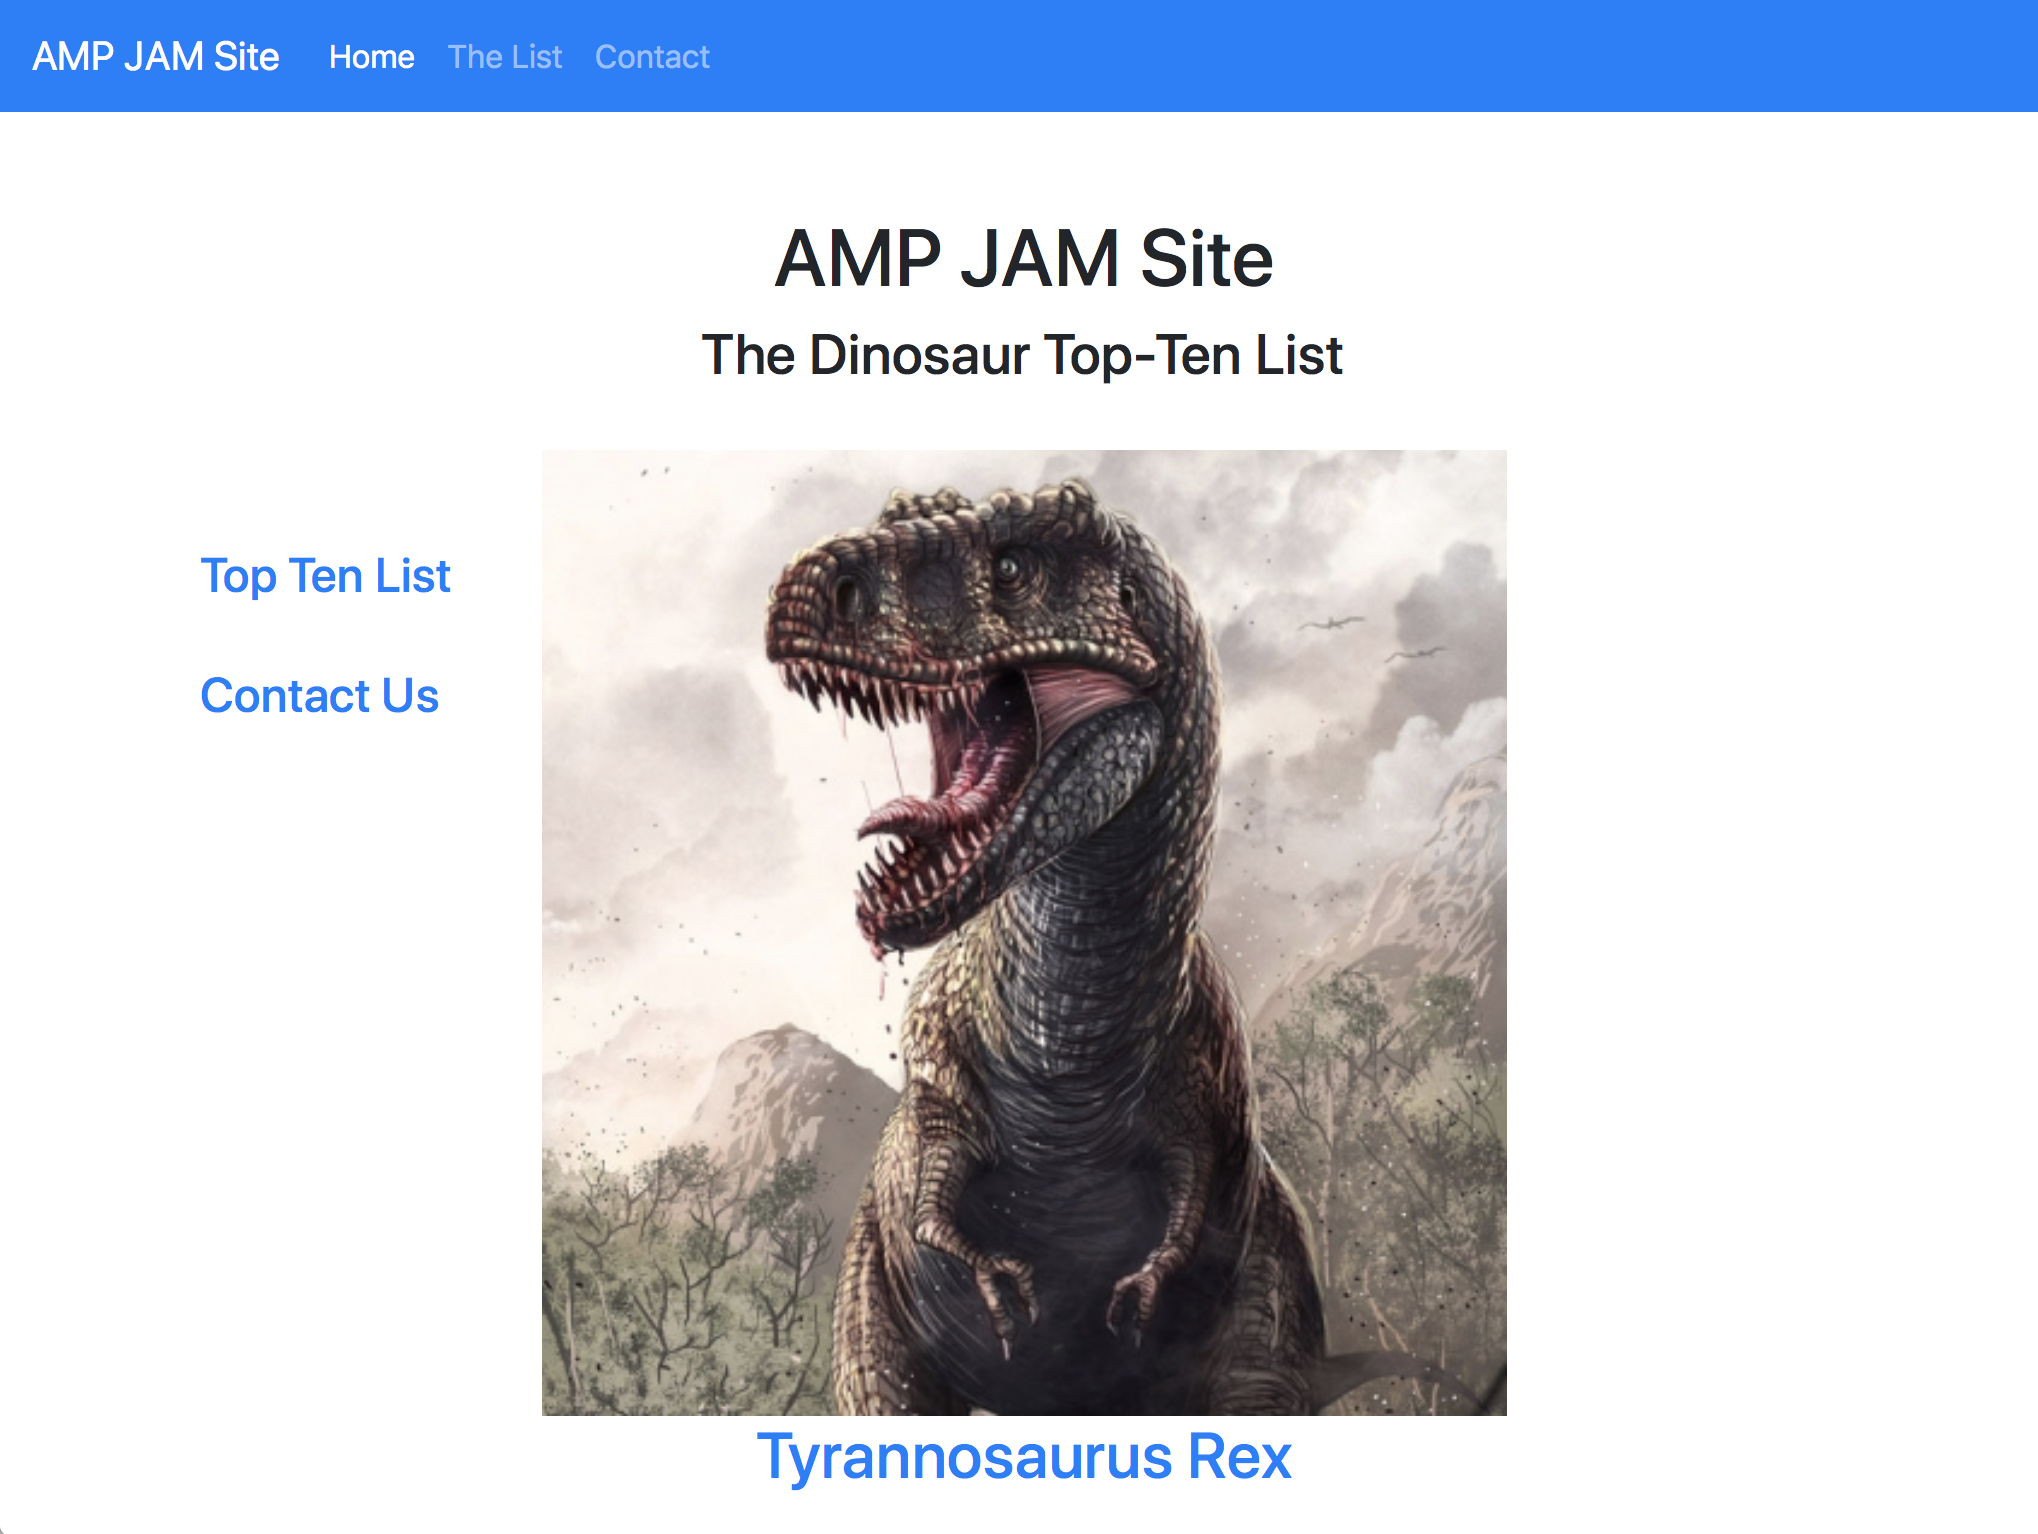
The Home Page. Let's revisit index.php and make a home page for the site. The page should have a headline, a "table of contents"-style secondary navigation, and a large dinosaur image, randomly selected from the list table in the database. The first step is to retrieve the image and related info from the database:
(index.php)
<?php
    include("n413connect.php");
    include("head.php");
    $sql = "SELECT * FROM `list`
            ORDER BY RAND() LIMIT 1";
    $result = mysqli_query($link, $sql);
    $row = mysqli_fetch_array($result, MYSQLI_BOTH);
?>
    <h1>AMP JAM Site</h1>
This is a variation of the SQL query used for the list.php script. The query selects an entire record from the table, but the table is randomly ordered by the RAND() function, and limited to one record. This means the first record we get will be random. Since we will only get one record, the "while" loop is not needed. We simply assign the result to $row.
The next step is to format the headline with Bootstrap's grid system:
(index.php)
...
    <div class="container-fluid">
        <div id="headline" class="row mt-5">
            <div class="col-12 text-center">
                <h1>AMP JAM Site</h1>
            </div> <!-- /col-12 -->
        </div> <!-- /row -->
    </div> <!-- /container-fluid -->
Some explanation: Here you see Bootstrap's classic container-row-column system. The outer <div> is for the container. In this case it is a "container-fluid" class, which will use 100% of the width available. Inside the container can be any number of row's. Each row can contain up to 12 columns. We want to center the headline in the full width of the window, so we use the "col-12" class. We add an id ("headline") and additional classes to create some top margin for the row("mt-5") and center the text in the column.
A second row will hold a sub-title:
(index.php)
...
    <div class="container-fluid">
        <div id="headline" class="row mt-5">
            <div class="col-12 text-center">
                <h1>AMP JAM Site</h1>
            </div> <!-- /col-12 -->
        </div> <!-- /row -->
        <div id="subtitle" class="row">
            <div class="col-12 text-center">
                <h3>The Dinosaur Top-Ten List</h3>
            </div> <!-- /col-12 -->
        </div> <!-- /row -->
    </div> <!-- /container-fluid -->
A third row will hold the page content in 3 columns of varying widths. Give the row an id of "content", and a margin-top class ("mt-5"). The leftmost column is a "col-1" spacer column designed to create a left-side margin. The second will be class "col-2" and hold a table-of-contents navigation menu. The third will be 6 columns wide, centered in the window, and will hold a linked image with a caption:
(index.php)
...
    <div class="container-fluid">
        <div id="headline" class="row mt-5">
            <div class="col-12 text-center">
                <h1>AMP JAM Site</h1>
            </div> <!-- /col-12 -->
        </div> <!-- /row -->
        <div id="subtitle" class="row">
            <div class="col-12 text-center">
                <h3>The Dinosaur Top-Ten List</h3>
            </div> <!-- /col-12 -->
        </div> <!-- /row -->
        <div id="content" class="row mt-5">
            <div class="col-1"></div><!-- spacer -->
            <div class="col-2 mt-5"> <!-- navigation -->
                <a href="list.php" ><h4>Top Ten List</h4></a>
                <a href="form.php" ><h4>Contact Us</h4></a>
            </div>
            <div class="col-6 text-center"> <!-- image -->
                <a href="list.php">
                    <img src="images/<?php echo $row["image"]; ?>" width="100%"; /><br/>
                    <h2><?php echo $row["item"]; ?></h2></a>
            </div><!-- image placeholder -->
        </div> <!-- /row -->
    </div> <!-- /container-fluid -->
Test this in your browser. Study how the row-column grid system sets up the layout. Resize the window to watch how the Bootstrap classes handle responsive design. With a row containing 12 columns, placing 3 columns to the left will center a 6-column wide image. The rightmost 3-column space does not need to be defined unless there is content to go there. The use of other formatting classes ( text-center, mt-*, etc.) provides centering, margins, etc.
Finally, notice how data from the list table is dropped in to the column with the inline PHP tags. The PHP variable $row is an associative array with index keys using the same names as the list table's columns. We just drop in the value from the database column we need.
You might want to use a simplified version of the inline PHP syntax here:
<?=$PHP_variable?>
This syntax style removes the need for the echo command and other syntax. It is very useful.
Note: The mt-* classes are part of a larger set of Bootstrap spacing classes that provide margin/padding spacing with levels from 0 to 5. There are also negative spacings for margins. Alternatively, you can use your own classes to set margins/padding, or drop in inline styles to get the margin/padding you need. However, be careful with setting horizontal margins for columns. You may cause the row to wrap to a new line unexpectedly if the horizontal width exceeds 100%.
So far, index.php script looks like this:
(index.php)
<?php
    include("n413connect.php");
    include("head.php");
    $sql = "SELECT * FROM `list`
            ORDER BY RAND() LIMIT 1";
    $result = mysqli_query($link, $sql);
    $row = mysqli_fetch_array($result, MYSQLI_BOTH);
?>
<div class="container-fluid">
        <div id="headline" class="row mt-5">
            <div class="col-12 text-center">
                <h1>AMP JAM Site</h1>
            </div> <!-- /col-12 -->
        </div> <!-- /row -->
        <div id="subtitle" class="row">
            <div class="col-12 text-center">
                <h3>The Dinosaur Top-Ten List</h3>
            </div> <!-- /col-12 -->
        </div> <!-- /row -->
        <div id="content" class="row mt-5">
            <div class="col-1"></div><!-- spacer -->
            <div class="col-2 mt-5"> <!-- navigation -->
                <a href="list.php" ><h4>Top Ten List</h4></a>
                <a href="form.php" ><h4>Contact Us</h4></a>
            </div>
            <div class="col-6 text-center"> <!-- image -->
                <a href="list.php">
                    <img src="images/<?php echo $row["image"]; ?>" width="100%"; /><br/>
                    <h2><?php echo $row["item"]; ?></h2></a>
            </div><!-- image placeholder -->
        </div> <!-- /row -->
    </div> <!-- /container-fluid -->
jQuery Script. A jQuery script will be used to customize the nav-bar for each page load. The page <title> will be updated, the active <li> tag will be assigned the active class, and the active <a> tag will be given special screen-reader content.
If you are new to jQuery, have a look at the Resources page to learn the basics.
There will be two jQuery scripts. The first script will be a "$(document).ready()" script, which runs as soon as the page has loaded. The purpose of the script will be to set the page title and send the page name to the nav-bar. We will place this script on each page, since each page will need a unique version.
The second script will be called "navbar_update()" and will receive the page name as an argument. It will set the nav-bar links for the current page as "active". Later, we will want to make changes to this script as we add features in future projects. We will place navbar_update() in the <head> section. This is because the <head> section will be common to each page, and when modifications are needed, we will not need to edit every page.
The first step is to add <script> tags at the end of the script for each page, between the </body> and </html> tags. The list.php file will already have <script> tags, but add them to index.php and form.php. If either index.php or form.php does not have the </body> and </html> tags, add those when you add the <script> tags.
(index.php)
...
    </body>
    <script>

    </script>
</html>
Now set up two Javascript variables to hold the page title, and page name. This will be different for each page. Look at back at head.php, and notice the ids for each of the <li> and <a> tags in the link list section.
- The link ids for index.php are called home_item and home_link. Call this page "home" and give it the title "AMP JAM Site | Dinosaur Top Ten".
- Similarly, the link ids for list.php are list_item and list_link. Call this page "list" and give it the title "AMP JAM Site | Dinosaur Top Ten List".
- The link ids for form.php are contact_item and contact_link. Call this page "contact" and give it the title "AMP JAM Site | Contact Form".
Create the variables like this:
(index.php)
    ...
    </body>
    <script>
        var this_page = "home";
        var page_title = "AMP JAM Site | Dinosaur Top Ten";

    </script>
</html>
Follow the same pattern for list.php and form.php, placing the variables at the beggining of the script, above the existing show_alert() function in list.php.
Now write the $(document).ready() function. With jQuery, "$(document)" refers to the "document object", and the ready() function will run as soon as the document object is constructed. The ready() function takes a function as its argument. This is called an "anonymous" function, since it is not named the usual way. We will write a function inside the argument for ready(). Inside the parentheses, put the key word "function", followed by the new function's argument parentheses and curly braces:
$(document).ready(function(){});
Study the format of the syntax, because code will be added in between the curly braces, and it gets very tricky to work out what needs to be closed when things get complicated. If it's not right, things break. It is a good practice to write it out just as you see here before adding anything. Then open a few lines between the curly braces for adding your code. A comment following the closing ready() parentheses is another good way to preserve your sanity:
$(document).ready(function(){

    }); //ready
Now, add some Javascript to set the page title and call the "navbar_update" function (which we will write next):
(index.php)
        ...
        var this_page = "home";
        var page_title = "AMP JAM Site | Dinosaur Top Ten";
        $(document).ready(function(){
                document.title = page_title;
                navbar_update(this_page);
            }); //ready
        ...
Make the changes in all of your scripts.
For the next step, open head.php. At the end of the <head> section, open <script> tags and start a function named "navbar_update", with an argument named "this_page":
(head.php)
...
            <script src="js/jquery-3.4.1.min.js" type="application/javascript"></script>
            <script src="js/bootstrap.min.js" type="application/javascript"></script>
            <script src="js/bootstrap.min.js.map" type="application/javascript"></script>

            <script>
                function navbar_update(this_page){

                }
            </script>
        </head>
        <body>
            <nav class="navbar navbar-expand-lg navbar-light bg-light">
               ...
The first operation will be to select the nav item that corresponds to "this_page" and add the active class to it. For the index.php file, this will be the element with the "home_item" id, or #home_item. If we were not using use a variable, we would write the jQuery selector as:
$("#home_item")
But since we are writing a function that updates the nav-bar for all the pages, we insert the "this_page" argument into the selector string, like this:
$("#"+this_page+"_item")
Note: In the jQuery selector, ids, classes, and element names ("body", "p") are always quoted. Document-level objects, such as document or window are not. When variables are used in the selector, they are not quoted.
To add the active class to the selector, use jQuery's addClass() function:
(head.php)
...
    function navbar_update(this_page){
        $("#"+this_page+"_item").addClass('active');
    }
...

Save head.php, try it in a browser, and you should see the nav-bar highlight the link for each page.
Now you should add the screen reader code needed for the active link's <a> tag. This is done by selecting the <a> tag element and appending the screen reader HTML to the <a> tag's HTML:
(head.php)
...
    function navbar_update(this_page){
        $("#"+this_page+"_item").addClass('active');
        $("#"+this_page+"_link").append(' <span class="sr-only">(current)</span>');
    }
...
You won't notice this change unless you have a screen reader, but if you check the web inspector, you will see that the change does happen.
Before we go further, update list.php and form.php with Bootstrap layout and formatting.
For both files, insert Bootstrap's container-row-column structure.
- Just above the <h2> headline, add the <div> tags for "container-fluid", "row", and "col-12".
- Add the "text-center" and "mt-5" classes to the "col-12" div.
- Just below the <h2> headline, close the column and row div tags.
- Close the "container-fluid" div tag near the end of the script, just before the </body> tag.
It should look like this:
(list.php & form.php)
    ...
    <div class="container-fluid">
        <div id="headline" class="row mt-5">
            <div class="col-12 text-center">
                <h2>Full Stack Amp Jam ____ Project</h2>
            </div> <!-- /.col-12 -->
        </div> <!-- /.row -->
        .
        .
        .
     </div> <!-- /.container-fluid -->
 </body>
Update both files and check them in the browser.
Update list.php With the list.php file, delete the styles inside the <style> tags. Bootstrap will replace those styles, but you need to add in a cursor pointer style that Bootstrap doesn't provide. Also, update the headline to read "Dinosaurs Top 10 List".
Inside the PHP tags, replace the text output of the original echo command with a row enclosing 3 divs, as you see here:
(list.php)
    <style>
        .cursor-pointer {cursor:pointer;}
    </style>
    <div class="container-fluid">
        <div id="headline" class="row mt-5">
            <div class="col-12 text-center">
                <h2>Dinosaurs Top 10 List</h2>
            </div> <!-- /.col-12 -->
        </div> <!-- /.row -->
        <?php
            foreach ($records as $record){
                echo '
                <div class="row mt-3 cursor-pointer">
                    <div class="col-1"></div>  <!-- spacer -->
                    <div class="col-2"><img src="images/'.$record["image"].'" width="100%"/></div>
                    <div class="col-7"><b>'.$record["item"].'</b> '.$record["description"].'</div>
                </div>  <!-- /.row -->';
            } //foreach
        ?>
    </div> <!-- /.container-fluid -->
</body>
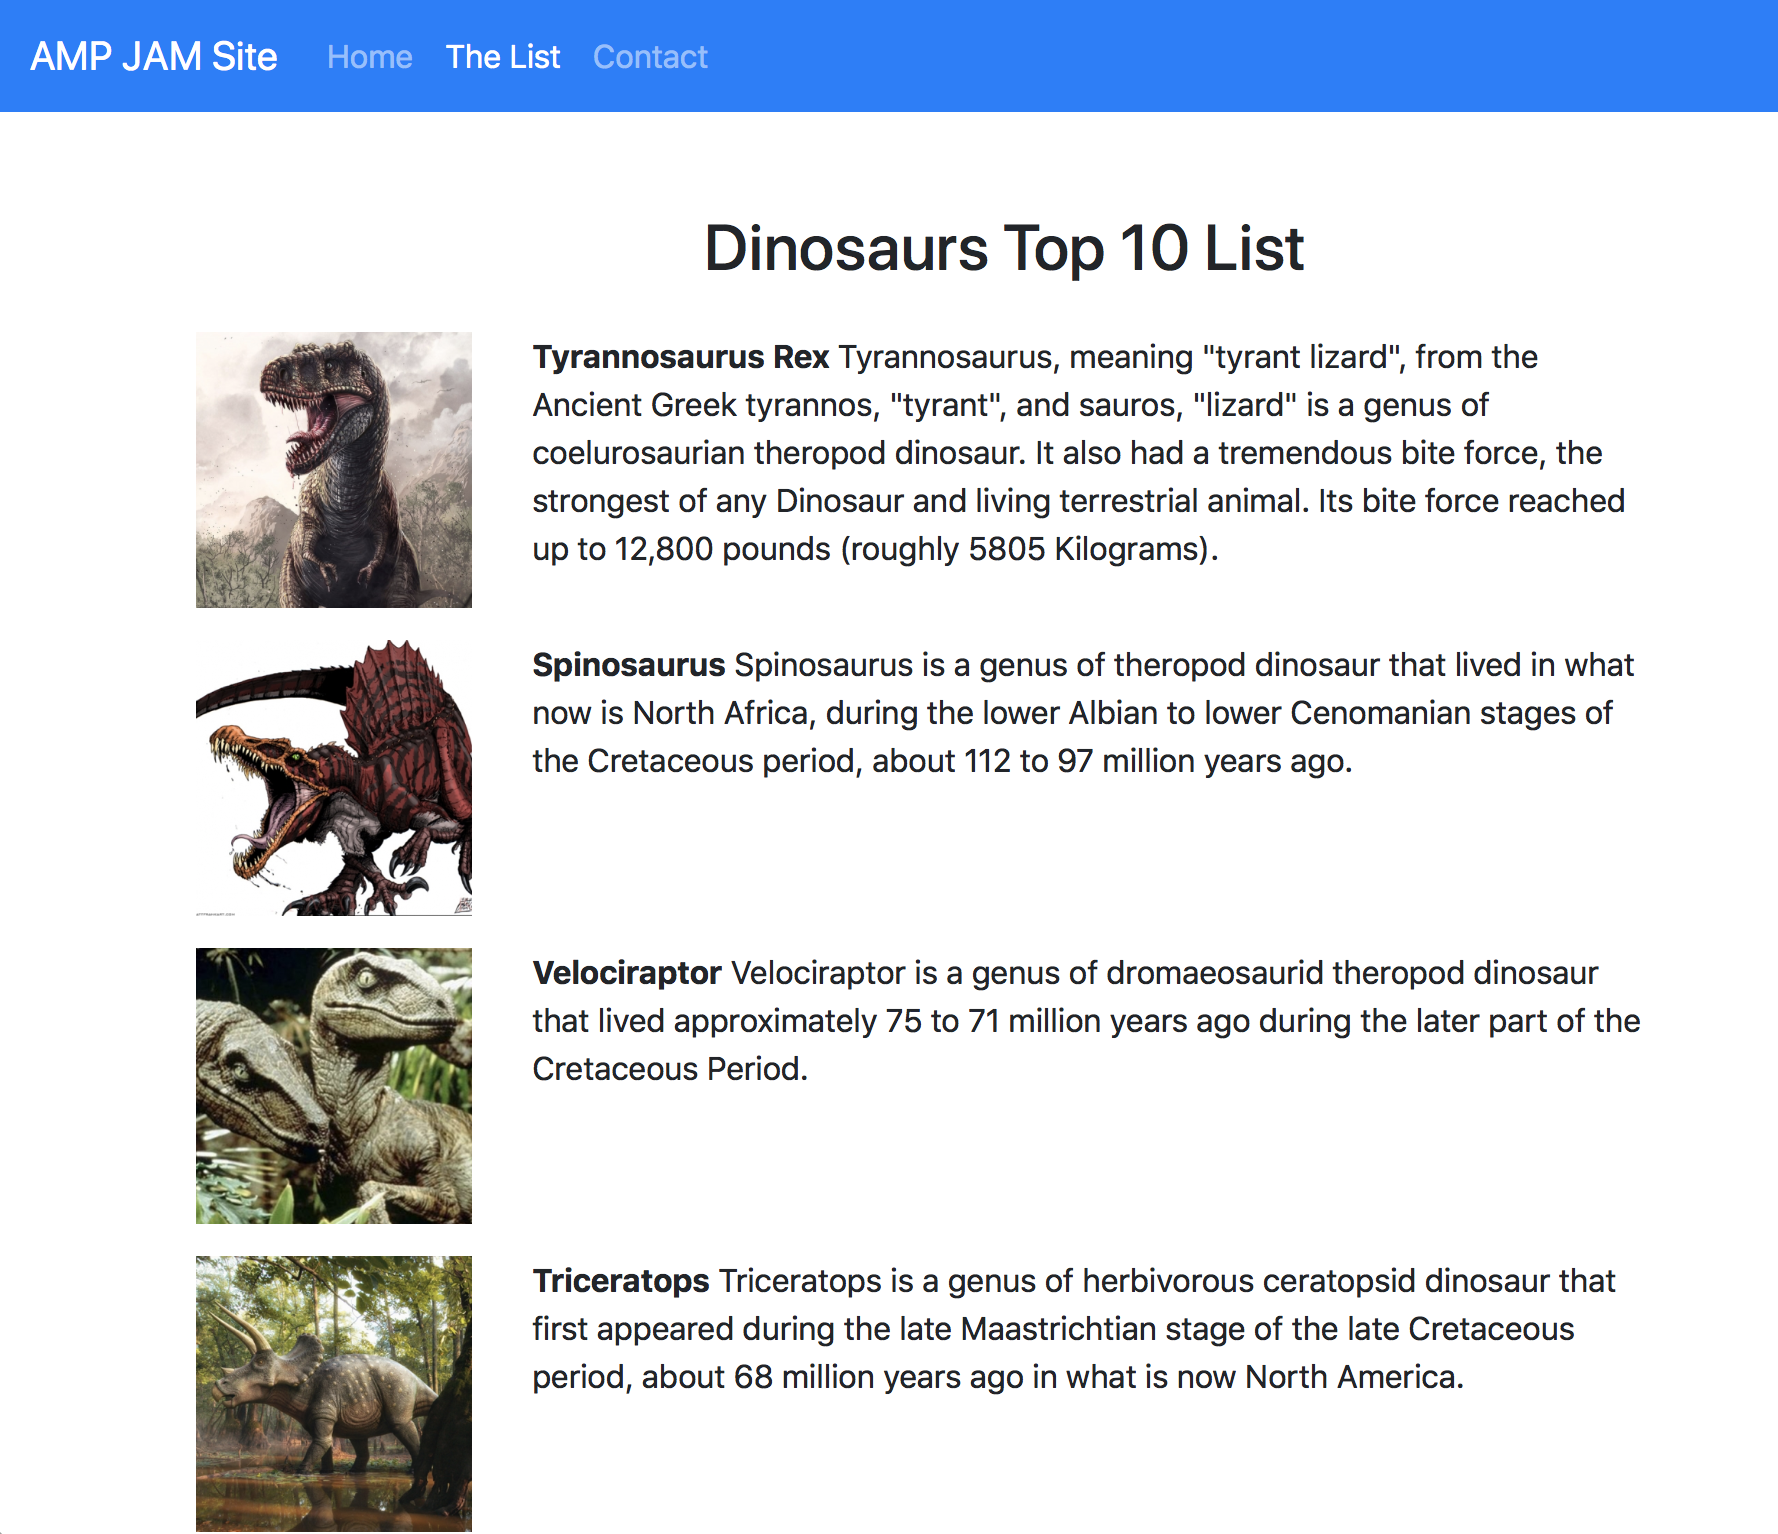
The echo command will be repeated for each list item from the database, and it will draw a Bootstrap row with 3 columns. The row has a margin-top spacer class ("mt-3") and the "cursor-pointer" class from the <style> tag. Inside the row are three columns. The first is a 1-column wide spacer. The second is 2-columns wide, and holds the image URL from the database record. The 3rd column is 7 columns wide, and holds the item name and description text.
Test this in the browser to see if it works.
With this version, we will use an "event listener" to replace the old "onClick" set-up. This time, the entire row will be a click-able target, and we will add a class to the "row" div named "record-item" that can be used to attach the event listener using jQuery.
We will use jQuery data-attributes in the "row" div to identify what was clicked. The data-attributes will be "data-id" and "data-item", which will correspond to the arguments we used in the previous version of the file:
(list.php)
...
<?php
    foreach ($records as $record){
        echo '
        <div class="row record-item mt-3 cursor-pointer" data-id="'.$record["id"].'" data-item="'.$record["item"].'">
           <div class="col-1"></div>  <!-- spacer -->
           <div class="col-2"><img src="images/'.$record["image"].'" width="100%"/></div>
           <div class="col-7"><b>'.$record["item"].'</b> '.$record["description"].'</div>
        </div>  <!-- /.row -->';
    } //foreach
?>
...
Take a moment to study the "row" div, as it is quite a mash-up of PHP, HTML, CSS, with some jQuery-ish attributes. The use of data-attributes eliminates the need for escaping quotes, which does simplify the syntax a little. At least we are not writing Javascript in the middle of it all. The data-attributes will allow us to use jQuery to get access to the data later.
Move to the $(document).ready() function. Insert some blank lines at the end of the function. Write a selector for the "record-item" class and add the on() function. The on() function requires two arguments: an event, and a function that is triggered when the event fires. Our event is "click" and an anonymous function will be the second argument:
(list.php)
    ...
    var this_page = "list";
    var page_title = "AMP JAM Site | Dinosaur Top Ten List";
        $(document).ready(function(){
            document.title = page_title;
            navbar_update(this_page);

            $(".record-item").on("click", function(){}); //on()
        }); //ready
    ...
The function will be able to use jQuery's "this" keyword to reference the element that was clicked. If we put "this" in a jQuery selector, we can use the jQuery data() function to get the data attributes and pass them to the show_alert() function we used before:
(list.php)
   ...
   $(".record-item").on("click", function(){
           var id = $(this).data('id');
           var item = $(this).data('item');
           show_alert(id,item);
       }); //on()
The complete code for list.php looks like this:
(list.php)
<?php
    include("n413connect.php");
    include("head.php");
    $sql = "SELECT id, item, description, image FROM `list`";
    $result = mysqli_query($link, $sql);
        $records = array();
        while ($row = mysqli_fetch_array($result, MYSQLI_BOTH)){
            $records[] = $row;
        }
?>
    <style>
        .cursor-pointer {cursor:pointer;}
    </style>
    <div class="container-fluid">
        <div id="headline" class="row mt-5">
            <div class="col-12 text-center">
                <h2>Dinosaurs Top 10 List</h2>
            </div> <!-- /.col-12 -->
        </div> <!-- /.row -->
        <?php
            foreach ($records as $record){
                echo '
                <div class="row record-item mt-3 cursor-pointer" data-id="'.$record["id"].'" data-item="'.$record["item"].'">
                    <div class="col-1"></div>  <!-- spacer -->
                    <div class="col-2"><img src="images/'.$record["image"].'" width="100%"/></div>
                    <div class="col-7"><b>'.$record["item"].'</b> '.$record["description"].'</div>
                </div>  <!-- /.row -->';
            } //foreach
        ?>
    </div> <!-- /.container-fluid -->
</body>
<script>
    var this_page = "list";
    var page_title = 'AMP JAM Site | Dinosaur Top Ten List';

    $(document).ready(function(){
            document.title = page_title;
            navbar_update(this_page);

        $(".record-item").on("click", function(){
                var id = $(this).data('id');
                var item = $(this).data('item');
                show_alert(id,item);
            }); //on()
        }); //document.ready

    function show_alert(id,item){
        alert("You have clicked Item "+id+", "+item+".");
    }
</script>
</html>
Give this a try in the browser. You should see alerts when you click on list items as you did before.
Detail Page. Instead of having list.php simply display an alert message when a list item is clicked, let's create a way to show a page that features the clicked item. We can do this by having the "onClick" event listener call a different function that uses the data attributes to load a customized page. Start by writing the new function:
function show_detail(id){
    window.location.assign("detail.php?id="+id);
}
The window.location.assign() function will redirect the page, using the id argument as a GET parameter for the URL. GET parameters are name-value pairs that are sent to the server along with the URL. PHP will be able to retrieve the data using the $_GET array.
Next, edit the $(document).ready() function in list.php. Change the on("click") handler to call the new function:
(list.php)
...
$(document).ready(function(){
    $("#"+this_page+"_item").addClass('active');
    $("#"+this_page+"_link").append(' <span class="sr-only">(current)</span>');
    document.title = page_title;

    $(".record-item").on("click", function(){
            var id = $(this).data('id');
            show_detail(id);
        }); //on()
}); //document.ready

function show_detail(id){
    window.location.assign("detail.php?id="+id);
}
...
If you test this in a browser, you will get a "404 Not Found" error, since we have not created the detail.php file yet.
Create a new file in the project directory and name it detail.php. Use the PHP "include" statements to create the database connection, <head> section, and nav-bar:
(detail.php)
<?php
    include("n413connect.php");
    include("head.php");

?>
Now, get the id from the $_GET array. Earlier, when data from form.php was processed, it was necessary to "sanitize" the input coming in from the form. We do a similar thing here, but it is simpler, since we know to expect an integer. The PHP function intval() will return the integer value of whatever we have received, eliminating the possibility of SQL injection. We can store the incoming value in the PHP variable $id, and use it in a query to get the record from the data table:
(detail.php)
<?php
    include("n413connect.php");
    include("head.php");
    $id = intval($_GET["id"]);
    $sql = "SELECT * FROM `list` WHERE id = '".$id."'";
    $result = mysqli_query($link, $sql);
?>
In previous queries, the WHERE clause has not been needed. In this case, the query is asking for a particular record, so the WHERE clause is used to define the logical condition for which record(s) to SELECT.
Since we expect to only get one record from our query, we will simply assign the result to $row:
(detail.php)
<?php
    include("n413connect.php");
    include("head.php");
    $id = intval($_GET["id"]);
    $sql = "SELECT * FROM `list` WHERE id = '".$id."'";
    $result = mysqli_query($link, $sql);
    $row = mysqli_fetch_array($result, MYSQLI_BOTH);
?>
However, it is still possible that the query might not return any records. In that case, $row will contain "false", and we will use Boolean logic to either display page content, or an error message. Set up the page layout with the Bootstrap container-row-column structure and drop in the PHP variables from the database:
(detail.php)
<?php
    include("n413connect.php");
    include("head.php");
    $id = intval($_GET["id"]);
    $sql = "SELECT * FROM `list` WHERE id = '".$id."'";
    $result = mysqli_query($link, $sql);
    $row = mysqli_fetch_array($result, MYSQLI_BOTH);
?>
<div class="container-fluid">
        <div id="headline" class="row mt-5">
            <div class="col-12 text-center">
            <?php
               if($row){
                   echo '<h1>'.$row["item"].'</h1>';
               }else{
                   echo '<h2>There has been a database error.</h2>';
               }
            ?>
            </div> <!-- /.col-12 -->
        </div> <!-- /.row -->
        <?php
            if($row){
                echo '
                <div id="content" class="row mt-3">
                    <div class="col-1"></div>  <!-- spacer -->
                    <div class="col-5"><img src="images/'.$row["image"].'" width="100%"/></div>
                    <div class="col-5 h3 text-muted">'.$row["description"].'</div>
                </div>  <!-- /.row -->';
            }
        ?>
        <div class="row mt-4">
            <div class="col-12 text-center">
            	<a href="list.php"><button class="btn btn-primary">Back to The List</button></a>
            </div> <!-- /.col-12 -->
        </div> <!-- /.row -->
    </div> <!-- /.container-fluid -->
</body>
</html>
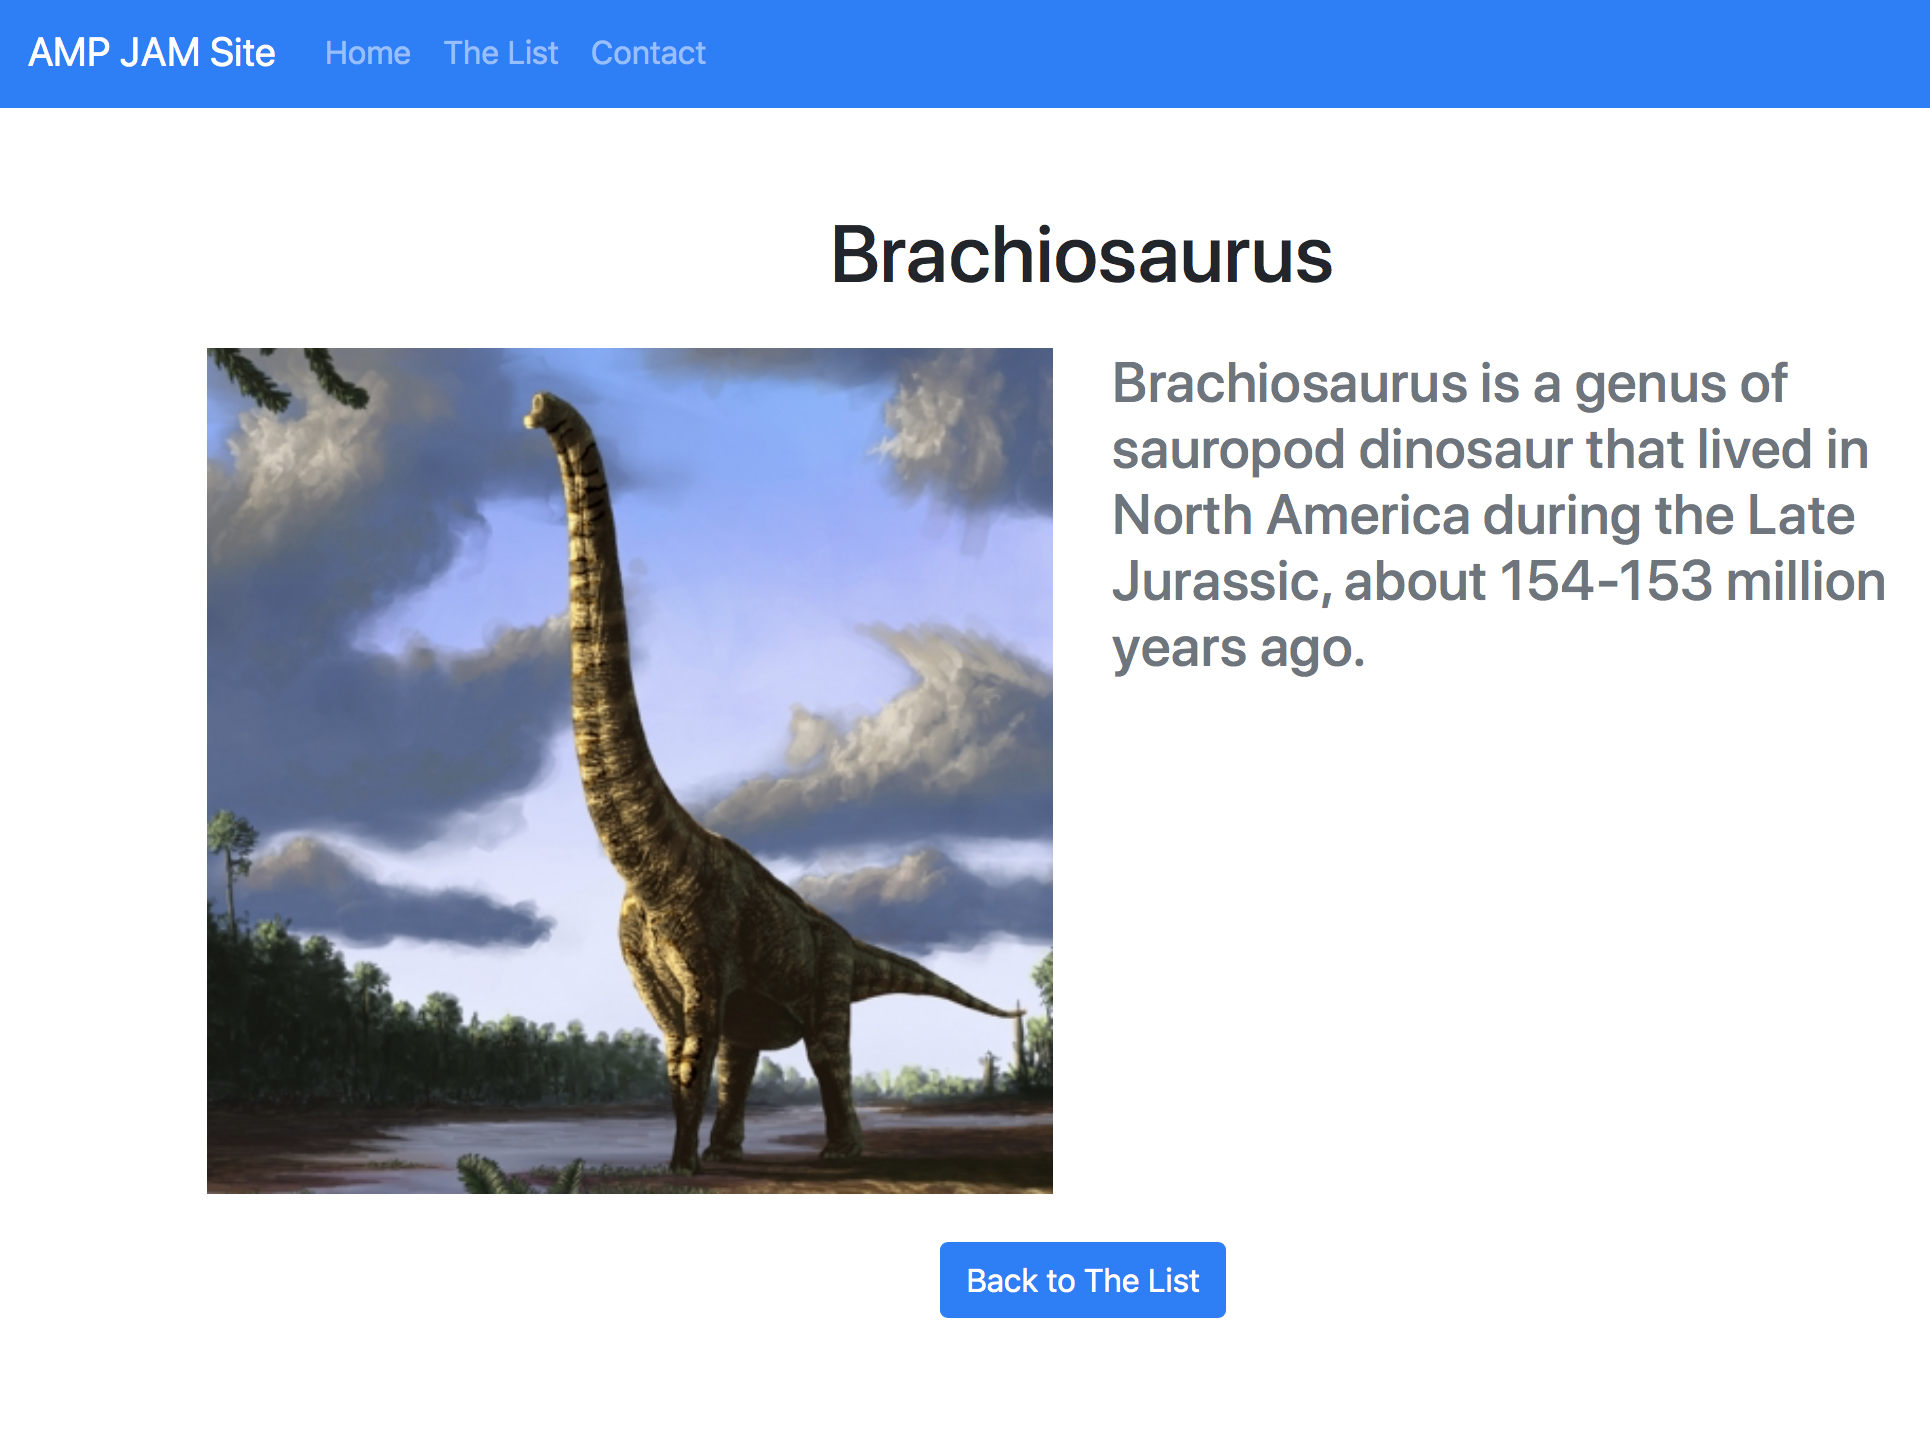
The page content structure is very similar to the structure of list.php, except there is only one record and the page elements are sized differently. Notice the Bootstrap text styling classes, which are self-explanatory. The "if" logic means that nothing will be rendered to the page except an error message and the "Back" button if there is no data. The <button> is styled with Bootstrap's btn class, and a color utility class.
Test the detail page in your browser. There is now a page for every record in the database, but only one page had to be created. This is the power of full-stack development. With some imagination, you can understand how databases such as catalogs, directories, or any large data set with a consistent structure can be rendered in this way.
Make one last test: With the detail page in your browser, edit the browser URL so the GET parameter is "id=0". Reload, and you will see the error version of the page.
Update form.php If you followed the above changes for form.php, your file should look like this:
(form.php)
<?php
    include("head.php");
?>
<style>
    body{ font-family:Arial; }
    h2{ text-align:center;margin-top:50px; }
    #form-container{ width:30%;margin-left:40%;margin-top:100px; }
    input{ font-size:18px;margin-bottom:20px; }
    textarea{height:100px;width:300px;margin-bottom:30px;font-size:16px; }
    #submit{float:right;}
</style>

<div class="container-fluid">
    <div id="headline" class="row mt-5">
        <div class="col-12 text-center">
            <h2>Full Stack Amp Jam Contact Form Project</h2>
        </div> <!-- /col-12 -->
    </div> <!-- /row -->
    <form method="POST" action="n413post.php">
        <div id="form-container">
            Name: <input type="text" id="name" name="name" value="" placeholder="Enter Name" required/><br/>
            E-mail: <input type="email" id="email" name="email" value="" placeholder="Enter E-mail" required/><br/>
            Comment: <textarea id="comment" name="comment" value="" placeholder="Add your comment here:"></textarea><br/>
            <input type="submit" id="submit" value="Submit" />
        </div>
    </form>
</body>
<script>
    var this_page = "contact";
    var page_title = 'AMP JAM Site | Contact Form';

    $(document).ready(function(){
            document.title = page_title;
            navbar_update(this_page);
        }); //document.ready
</script>
</html>
Begin by removing the <style> tags and their content. The styling will be replaced with Bootstrap style classes.
The basic Bootstrap container-row-column structure is in place for the outer part of the script, but the inner structure of the form needs to be set up with Bootstrap. Just below the <form> tag, enclose the contents of the form (but not the <form> tags) within a row. Close the "row" div just before the closing </form> tag
The first column in the row will be a 4-column wide spacer column. Second, add a "col-4" class to the "form-container" div. It should look like this:
(form.php)
...
<form method="POST" action="n413post.php">
    <div class="row">
        <div class="col-4"></div>  <!-- spacer -->
        <div id="form-container" class="col-4">
            Name: <input type="text" id="name" name="name" value="" placeholder="Enter Name" required/><br/>
            E-mail: <input type="email" id="email" name="email" value="" placeholder="Enter E-mail" required/><br/>
            Comment: <textarea id="comment" name="comment" value="" placeholder="Add your comment here:"></textarea><br/>
            <input type="submit" id="submit" value="Submit" />
        </div>  <!-- /#form-container -->
    </div>  <!-- /.row -->
</form>
...
Now for the styling: create some margin-top for the form layout by adding the "mt-5" class to the row. Then add the "form-control" class to the input and textarea tags (but not the submit input). Change the submit input into a <button> and give it the btn classes, as shown:
(form.php)
...
<form method="POST" action="n413post.php">
    <div class="row mt-5">
        <div class="col-4"></div>  <!-- spacer -->
        <div id="form-container" class="col-4">
            Name: <input type="text" id="name" name="name" class="form-control" value="" placeholder="Enter Name" required/><br/>
            E-mail: <input type="email" id="email" name="email" class="form-control" value="" placeholder="Enter E-mail" required/><br/>
            Comment: <textarea id="comment" name="comment" class="form-control" value="" placeholder="Add your comment here:"></textarea><br/>
            <button type="submit" id="submit" class="btn btn-primary float-right">Submit</button>
        </div>  <!-- /#form-container -->
    </div>  <!-- /.row -->
</form>
...
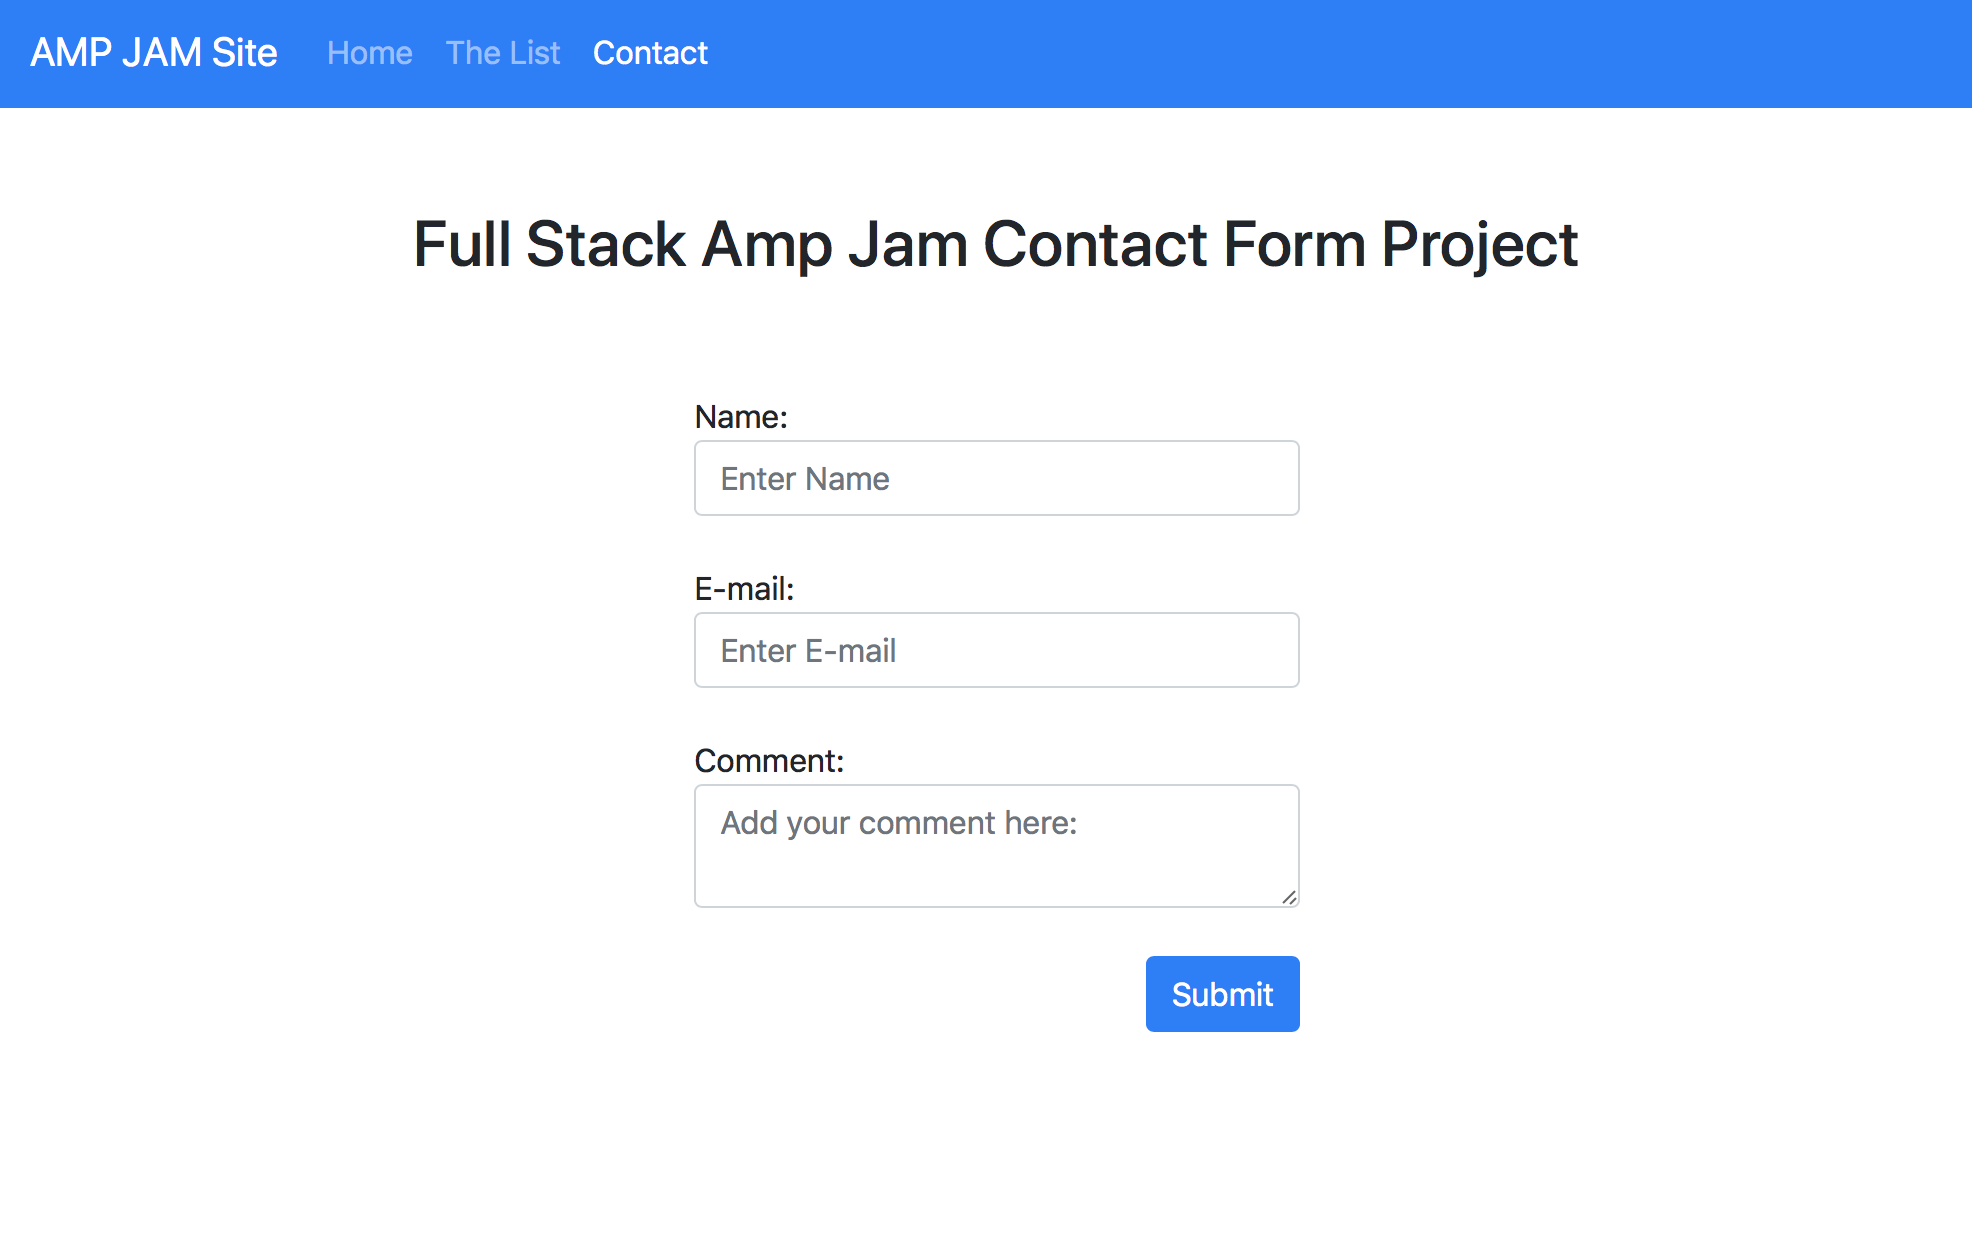
Bootstrap's form-control classes will style input, textarea boxes, select boxes, and much more with cross-browser consistency. Form verification and other features come along with the Bootstrap form classes. Styling for the <button> tag requires the btn class and a color utility class ("btn-primary"). The "float-right" class positions the button as you would expect.
Test it in your browser to see the changes.
The complete script for form.php is here:
(form.php)
<?php
    include("head.php");
?>

<div class="container-fluid">
    <div id="headline" class="row mt-5">
        <div class="col-12 text-center">
            <h2>Full Stack Amp Jam Contact Form Project</h2>
        </div> <!-- /col-12 -->
    </div> <!-- /row -->

<form method="POST" action="n413post.php">
    <div class="row mt-5">
        <div class="col-4"></div>  <!-- spacer -->
        <div id="form-container" class="col-4">
            Name: <input type="text" id="name" name="name" class="form-control" value="" placeholder="Enter Name" required/><br/>
            E-mail: <input type="email" id="email" name="email" class="form-control" value="" placeholder="Enter E-mail" required/><br/>
            Comment: <textarea id="comment" name="comment" class="form-control" value="" placeholder="Add your comment here:"></textarea><br/>
            <button type="submit" id="submit" class="btn btn-primary float-right">Submit</button>
        </div>  <!-- /#form-container -->
    </div>  <!-- /.row -->
</form>
</body>
<script>
    var this_page = "contact";
    var page_title = 'AMP JAM Site | Contact Form';

    $(document).ready(function(){
            document.title = page_title;
            navbar_update(this_page);
        }); //document.ready
</script>
</html>
If you submit the Contact form, you will notice the "Thank you" page does not have a nav-bar, and there's no navigation link to get back to the site. So, n413post.php must be updated with the nav-bar.
Update n413post.php First, add the "include" for head.php:
(n413post.php)
<?php
    include("n413connect.php");
    include("head.php");
...
Next, following the intial set of PHP tags, delete all of the <head> section, including the <!DOCTYPE> declaration, the <style> tags and the opening <body> tag. Then, wrap the headline in the Bootstrap container-row-column structure, closing the "container-fluid" div just before the closing </body> tag.
(n413post.php)
...
?>

<div class="container-fluid">
    <div id="headline" class="row mt-5">
        <div class="col-12 text-center">
            <h2>Full Stack Amp Jam Contact Form Project</h2>
        </div> <!-- /col-12 -->
    </div> <!-- /row -->
    <div id="message-container">
		<?php
			if($result){
			    echo '<p>Thank you for submitting your comment. <br/>';
			}else{
			    echo '<p>Sorry, but something went wrong.  Please try again later. <br/>';
			}
		?>
		    <span class="signoff">The Web Site Team</span></p>

        </div>  <!-- /.message-container -->
    </div> <!-- /.row -->
</div>  <!-- /.container-fluid -->
</body>
</html>
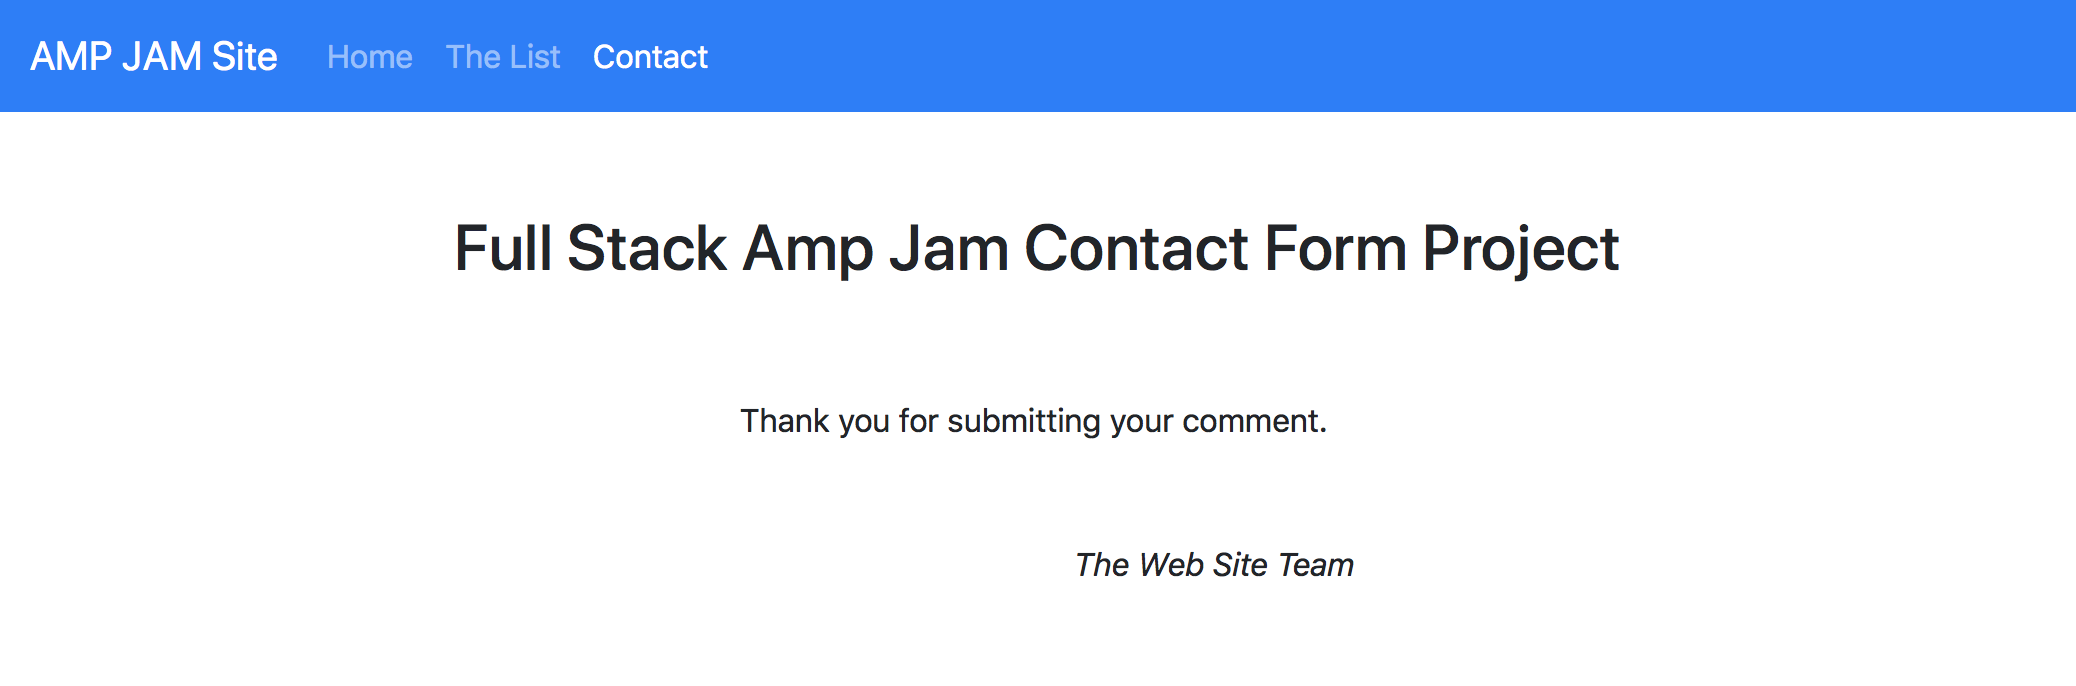
Add the Bootstrap formatting and classes. First, use a "row" div with a 5-level margin-top class, followed by a 4-column wide spacer. The message is enclosed in a 4-column space, with the text centered. Add in the signature with some margin-top and a float to pull it to the right:
(n413post.php)
...
        </div> <!-- /col-12 -->
    </div> <!-- /row -->
    <div class="row mt-5">
        <div class="col-4"></div>  <!-- spacer -->
        <div id="message-container" class="col-4 text-center">
        <?php
            if($result){
                echo '<p>Thank you for submitting your comment. <br/>';
            }else{
                echo '<p>Sorry, but something went wrong.  Please try again later. <br/>';
            }
        ?>
            <span class="mt-5 float-right"><i>The Web Site Team</i></span></p>

        </div> <!-- /.message-container -->
    </div> <!-- /.row -->
</div>  <!-- /.container-fluid -->
...
Last, drop in the jQuery script to set up the page title and nav-bar:
(n413post.php)
...
</div>  <!-- /.container-fluid -->
</body>
<script>
    var this_page = "contact";
    var page_title = 'AMP JAM Site | Contact Form';

    $(document).ready(function(){
            document.title = page_title;
            navbar_update(this_page);
        }); //document.ready
</script>
</html>
The finished script looks like this:
(n413post.php)
<?php
    include("n413connect.php");
    include("head.php");

    function sanitize($item){
            global $link;
            $item = html_entity_decode($item);
            $item = trim($item);
            $item = stripslashes($item);
            $item = strip_tags($item);
            $item = mysqli_real_escape_string( $link, $item );
            return $item;
        }

        $name = "";
        $email = "";
        $comment = "";

        if(isset($_POST["name"])) { $name = sanitize($_POST["name"]); }
    	if(isset($_POST["email"])) { $email = sanitize($_POST["email"]); }
        if(isset($_POST["comment"])) { $comment = sanitize($_POST["comment"]); }

        $sql = "INSERT INTO `form_responses` (`id`, `name`, `email`, `comment`, `timestamp`)
        	VALUES (NULL, '".$name."', '".$email."', '".$comment."', CURRENT_TIMESTAMP)";
        $result = mysqli_query($link, $sql);
?>

<div class="container-fluid">
    <div id="headline" class="row mt-5">
        <div class="col-12 text-center">
            <h2>Full Stack Amp Jam Contact Form Project</h2>
        </div> <!-- /col-12 -->
    </div> <!-- /row -->
    <div class="row mt-5">
        <div class="col-4"></div>  <!-- spacer -->
        <div id="message-container" class="col-4 text-center">
        <?php
            if($result){
                echo '<p>Thank you for submitting your comment. <br/>';
            }else{
                echo '<p>Sorry, but something went wrong.  Please try again later. <br/>';
            }
        ?>
            <span class="mt-5 float-right"><i>The Web Site Team</i></span></p>

        </div> <!-- /.message-container -->
    </div> <!-- /.row -->
</div>  <!-- /.container-fluid -->
</body>
<script>
    var this_page = "contact";
    var page_title = 'AMP JAM Site | Contact Form';

    $(document).ready(function(){
            document.title = page_title;
            navbar_update(this_page);
        }); //document.ready
</script>
</html>
The SITE Project
The SITE Project is now complete. You have a fully functional full-stack site with navigation, information, interactivity, and user feedback. You might try adding a few pages on your own, such as "About" or an "Events" page. But there's one feature we could add that would take the site to a whole new level: User Accounts.
You can open a completed version of the project in your browser here.
Here are completed versions of the scripts used for this project:
(n413connect.php)<?php $dbhost = 'localhost:8889'; //XAMPP is 'localhost:3306' $dbuser = 'root'; $dbpwd = 'root'; //XAMPP password is '' $dbname = 'ampjam_db'; $link = mysqli_connect($dbhost, $dbuser, $dbpwd, $dbname); if (!$link) { die('Connect Error (' . mysqli_connect_errno() . ') '. mysqli_connect_error()); } ?>
(head.php)<!DOCTYPE html> <html> <head> <meta http-equiv="Content-Type" content="text/html; charset=UTF-8" /> <meta name="viewport" content="width=device-width, initial-scale=1, user-scalable=yes"> <title>Full Stack Amp Jam Site Project</title> <link href="css/bootstrap.min.css" rel="stylesheet"> <script src="js/jquery-3.4.1.min.js" type="application/javascript"></script> <script src="js/bootstrap.min.js" type="application/javascript"></script> <script src="js/bootstrap.min.js.map" type="application/javascript"></script> <script> function navbar_update(this_page){ $("#"+this_page+"_item").addClass('active'); $("#"+this_page+"_link").append(' <span class="sr-only">(current)</span>'); } <script> </head> <body> <nav class="navbar navbar-expand-lg navbar-dark bg-primary"> <a class="navbar-brand" href="index.php">AMP JAM Site</a> <button class="navbar-toggler" type="button" data-toggle="collapse" data-target="#navbarNav" aria-controls="navbarNav" aria-expanded="false" aria-label="Toggle navigation"><span class="navbar-toggler-icon"></span> </button> <div class="collapse navbar-collapse" id="navbarNav"> <ul class="navbar-nav"> <li id="home_item" class="nav-item"> <a id="home_link" class="nav-link" href="index.php">Home</a> </li> <li id="list_item" class="nav-item"> <a id="list_link" class="nav-link" href="list.php">The List</a> </li> <li id="contact_item" class="nav-item"> <a id="contact_link" class="nav-link" href="form.php">Contact</a> </li> </ul> </div> </nav>
(index.php)<?php include("n413connect.php"); include("head.php"); $sql = "SELECT * FROM `list` ORDER BY RAND() LIMIT 1"; $result = mysqli_query($link, $sql); $row = mysqli_fetch_array($result, MYSQLI_BOTH); ?> <div class="container-fluid"> <div id="headline" class="row mt-5"> <div class="col-12 text-center"> <h1>AMP JAM Site</h1> </div> <!-- /col-12 --> </div> <!-- /row --> <div id="subtitle" class="row"> <div class="col-12 text-center"> <h3>The Dinosaur Top-Ten List</h3> </div> <!-- /col-12 --> </div> <!-- /row --> <div id="content" class="row mt-5"> <div class="col-1"></div><!-- spacer --> <div class="col-2 mt-5"> <!-- navigation --> <a href="list.php" ><h4>Top Ten List</h4></a> <a href="form.php" ><h4>Contact Us</h4></a> </div> <div class="col-6 text-center"> <!-- image --> <a href="list.php"> <img src="images/<?php echo $row["image"]; ?>" width="100%"; /><br/> <h2><?php echo $row["item"]; ?></h2></a> </div><!-- image placeholder --> </div> <!-- /row --> </div> <!-- /container-fluid --> </body> <script> var this_page = "home"; var page_title = "AMP JAM Site | Dinosaur Top Ten"; $(document).ready(function(){ document.title = page_title; navbar_update(this_page); }); //ready </script> </html>
(list.php)<?php include("n413connect.php"); include("head.php"); $sql = "SELECT id, item, description, image FROM `list`"; $result = mysqli_query($link, $sql); $records = array(); while ($row = mysqli_fetch_array($result, MYSQLI_BOTH)){ $records[] = $row; } ?> <style> .cursor-pointer {cursor:pointer;} </style> <div class="container-fluid"> <div id="headline" class="row mt-5"> <div class="col-12 text-center"> <h2>Dinosaurs Top 10 List</h2> </div> <!-- /.col-12 --> </div> <!-- /.row --> <?php foreach ($records as $record){ echo ' <div class="row record-item mt-3 cursor-pointer" data-id="'.$record["id"].'" data-item="'.$record["item"].'"> <div class="col-1"></div> <!-- spacer --> <div class="col-2"><img src="images/'.$record["image"].'" width="100%"/></div> <div class="col-7"><b>'.$record["item"].'</b> '.$record["description"].'</div> </div> <!-- /.row -->'; } //foreach ?> </div> <!-- /.container-fluid --> </body> <script> var this_page = "list"; var page_title = 'AMP JAM Site | Dinosaur Top Ten List'; $(document).ready(function(){ document.title = page_title; navbar_update(this_page); $(".record-item").on("click", function(){ var id = $(this).data('id'); show_detail(id); }); //on() }); //document.ready function show_detail(id){ window.location.assign("detail.php?id="+id); } </script> </html>
(detail.php)<?php include("n413connect.php"); include("head.php"); $id = intval($_GET["id"]); $sql = "SELECT * FROM `list` WHERE id = '".$id."'"; $result = mysqli_query($link, $sql); $row = mysqli_fetch_array($result, MYSQLI_BOTH); ?> <div class="container-fluid"> <div id="headline" class="row mt-5"> <div class="col-12 text-center"> <?php if($row){ echo '<h1>'.$row["item"].'</h1>'; }else{ echo '<h2>There has been a database error.</h2>'; } ?> </div> <!-- /.col-12 --> </div> <!-- /.row --> <?php if($row){ echo ' <div id="content" class="row mt-3"> <div class="col-1"></div> <!-- spacer --> <div class="col-5"><img src="images/'.$row["image"].'" width="100%"/></div> <div class="col-5 h3 text-muted">'.$row["description"].'</div> </div> <!-- /.row -->'; } ?> <div class="row mt-4"> <div class="col-12 text-center"> <a href="list.php"><button class="btn btn-primary">Back to The List</button></a> </div> <!-- /.col-12 --> </div> <!-- /.row --> </div> <!-- /.container-fluid --> </body> </html>
(form.php)<?php include("head.php"); ?> <div class="container-fluid"> <div id="headline" class="row mt-5"> <div class="col-12 text-center"> <h2>Full Stack Amp Jam Contact Form Project</h2> </div> <!-- /col-12 --> </div> <!-- /row --> <form method="POST" action="n413post.php"> <div class="row mt-5"> <div class="col-4"></div> <!-- spacer --> <div id="form-container" class="col-4"> Name: <input type="text" id="name" name="name" class="form-control" value="" placeholder="Enter Name" required/><br/> E-mail: <input type="email" id="email" name="email" class="form-control" value="" placeholder="Enter E-mail" required/><br/> Comment: <textarea id="comment" name="comment" class="form-control" value="" placeholder="Add your comment here:"></textarea><br/> <button type="submit" id="submit" class="btn btn-primary float-right">Submit</button> </div> <!-- /#form-container --> </div> <!-- /.row --> </form> </body> <script> var this_page = "contact"; var page_title = 'AMP JAM Site | Contact Form'; $(document).ready(function(){ document.title = page_title; navbar_update(this_page); }); //document.ready </script> </html>
(n413post.php)<?php include("n413connect.php"); include("head.php"); function sanitize($item){ global $link; $item = html_entity_decode($item); $item = trim($item); $item = stripslashes($item); $item = strip_tags($item); $item = mysqli_real_escape_string( $link, $item ); return $item; } $name = ""; $email = ""; $comment = ""; if(isset($_POST["name"])) { $name = sanitize($_POST["name"]); } if(isset($_POST["email"])) { $email = sanitize($_POST["email"]); } if(isset($_POST["comment"])) { $comment = sanitize($_POST["comment"]); } $sql = "INSERT INTO `form_responses` (`id`, `name`, `email`, `comment`, `timestamp`) VALUES (NULL, '".$name."', '".$email."', '".$comment."', CURRENT_TIMESTAMP)"; $result = mysqli_query($link, $sql); ?> <div class="container-fluid"> <div id="headline" class="row mt-5"> <div class="col-12 text-center"> <h2>Full Stack Amp Jam Contact Form Project</h2> </div> <!-- /col-12 --> </div> <!-- /row --> <div class="row mt-5"> <div class="col-4"></div> <!-- spacer --> <div id="message-container" class="col-4 text-center"> <?php if($result){ echo '<p>Thank you for submitting your comment. <br/>'; }else{ echo '<p>Sorry, but something went wrong. Please try again later. <br/>'; } ?> <span class="mt-5 float-right"><i>The Web Site Team</i></span></p> </div> <!-- /.message-container --> </div> <!-- /.row --> </div> <!-- /.container-fluid --> </body> <script> var this_page = "contact"; var page_title = 'AMP JAM Site | Contact Form'; $(document).ready(function(){ document.title = page_title; navbar_update(this_page); }); //document.ready </script> </html>
If you want to download completed versions of the PHP scripts and image files, you can find them here.
If you are ready, lets proceed to The ACCOUNT!